How to Install a SATA SSD in an Older Desktop PC
This guide is part of the PC upgrade how-to series, designed to help you safely install and upgrade hardware in desktop systems.
Upgrading an older desktop PC by installing a SATA SSD is one of the most effective ways to improve system responsiveness. Even systems that are several years old can feel dramatically faster once the operating system runs from an SSD instead of a mechanical hard drive.
This guide explains how to physically install a SATA SSD inside a typical older desktop computer. Most desktop cases built in the last 10–15 years follow a very similar internal layout, so the same basic steps apply to the majority of systems.
Installing a SATA SSD is also a common step when upgrading an older desktop PC from a traditional hard drive to solid-state storage.
Before starting the installation, make sure the computer is completely powered off and unplugged from the wall outlet.
What you need
Before installing a SATA SSD, make sure you have the following:
- 2.5″ SATA SSD
- SATA data cable (if not included)
- Available SATA power connector from the power supply
- 2.5″ mounting bracket (if required)
- Basic screwdriver
Some desktop systems already include spare SATA cables. If not, SATA cables are inexpensive and easy to install.
Recommended components for this upgrade:
- 500 GB 2.5″ SATA SSD
- 1 TB 2.5″ SATA SSD
- 1 TB 2.5″ SATA SSD – premium option
- SATA data cable
- 2.5″ SSD mounting bracket
Step 1 – Open the desktop case
Most desktop cases use two screws on the back panel to hold the side panel in place. After removing these screws, the side panel usually slides backward and can then be lifted away.
Older desktop systems often place the power supply at the top of the case, with hard drives mounted in drive cages near the front.
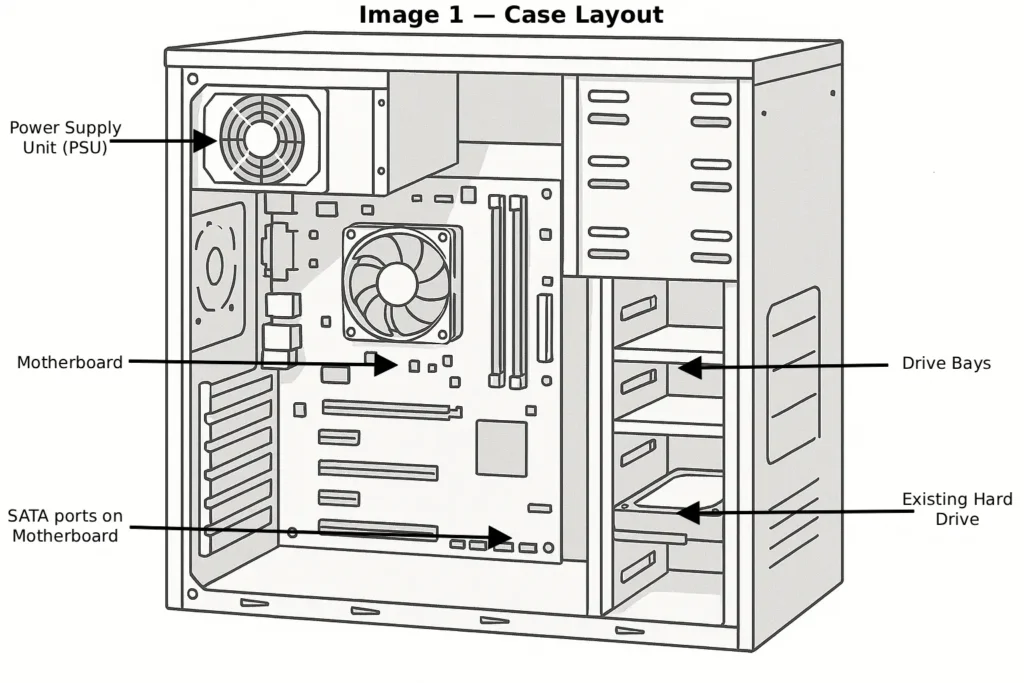
Step 2 – Locate the existing hard drive and SATA connections
Inside the case, locate the existing hard drive. It will typically be connected using:
- a SATA data cable running to the motherboard
- a SATA power cable coming from the power supply
These two connectors will also be used for the new SSD.
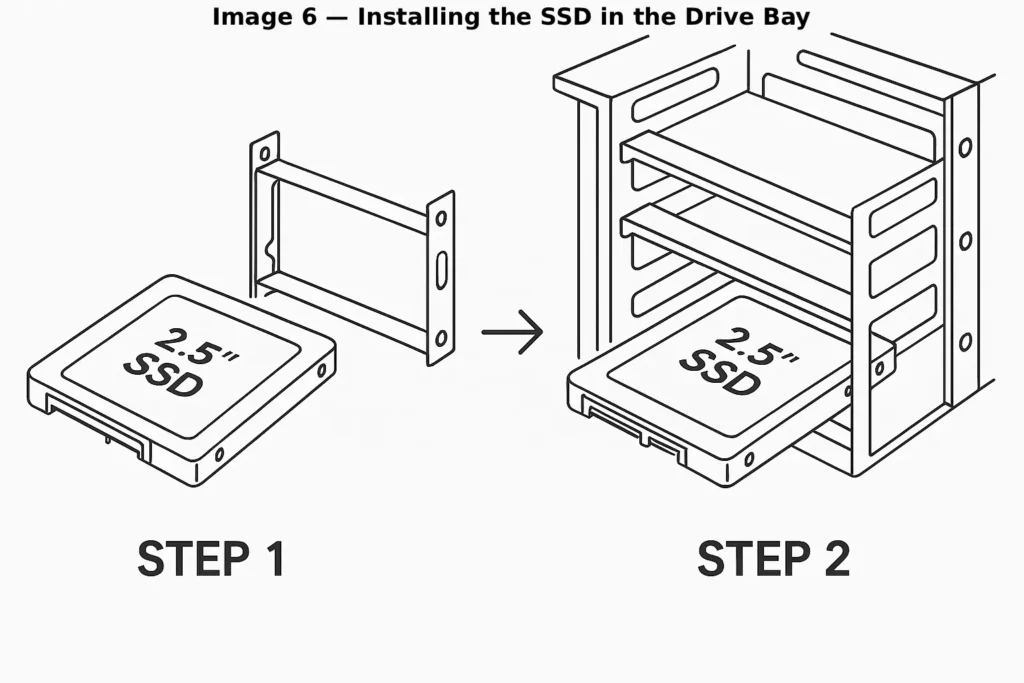
Step 3 – Mount the SSD in the case
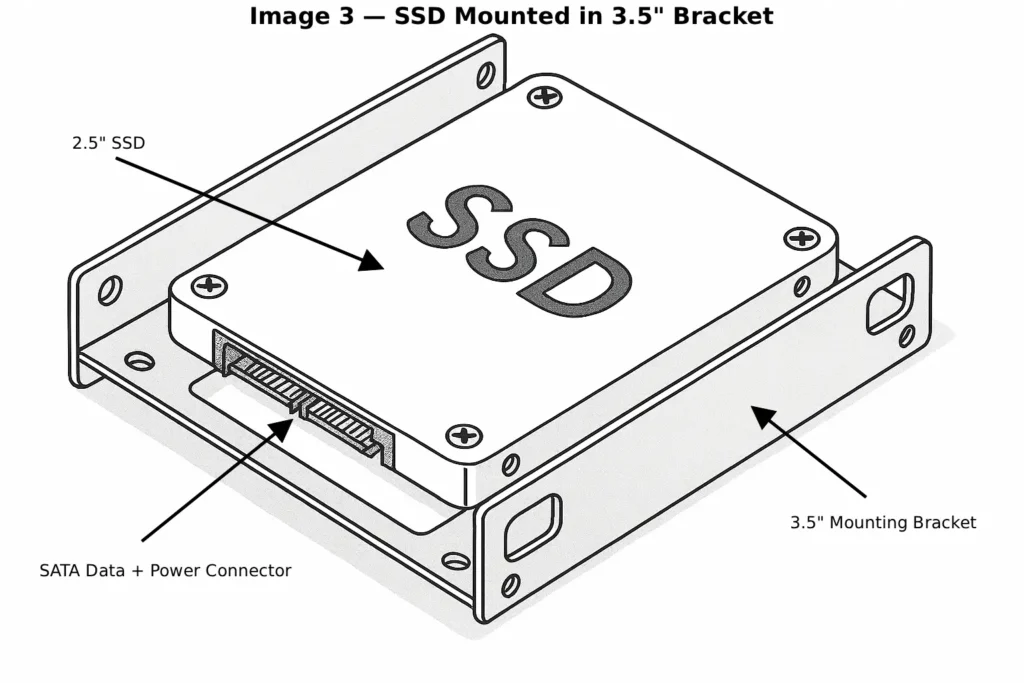
Most SATA SSDs use the 2.5-inch form factor, while many older desktop drive bays were designed for 3.5-inch hard drives.
In many cases you can install the SSD using a 2.5-inch to 3.5-inch mounting bracket, which allows the SSD to fit securely into the existing drive bay.
Some users also simply place the SSD in an empty location inside the case, since SSDs have no moving parts and are not sensitive to vibration.
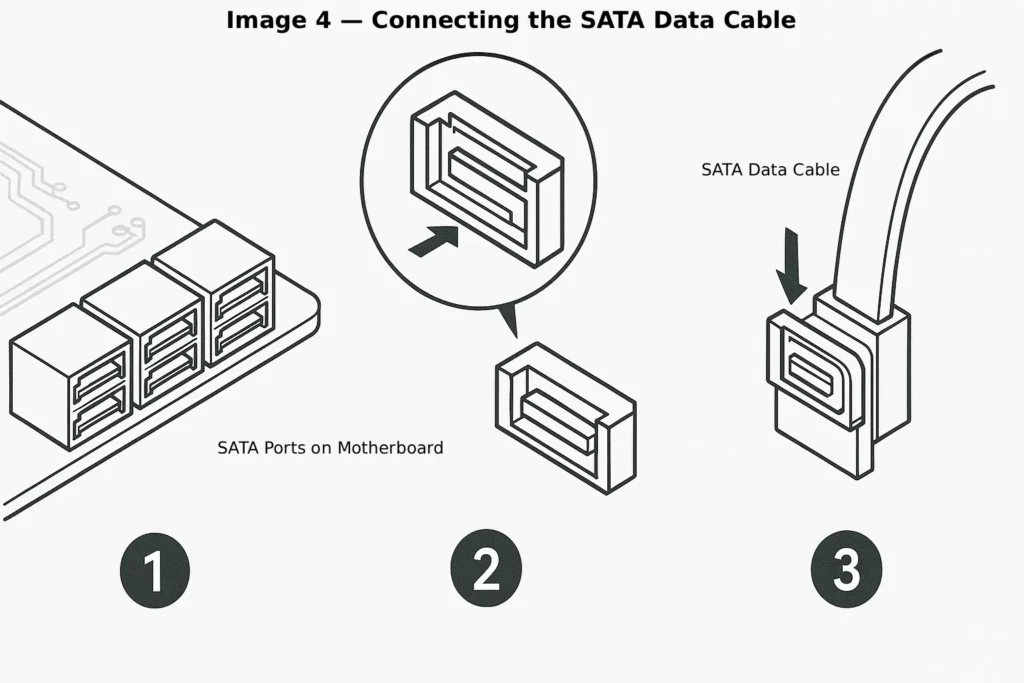
Step 4 – Connect the SATA data cable
Next, connect the SATA data cable between the SSD and an available SATA port on the motherboard.
SATA connectors are usually grouped together and labeled with numbers such as SATA0, SATA1, SATA2, and so on.
If the system already has multiple drives installed, simply connect the SSD to the next available port.
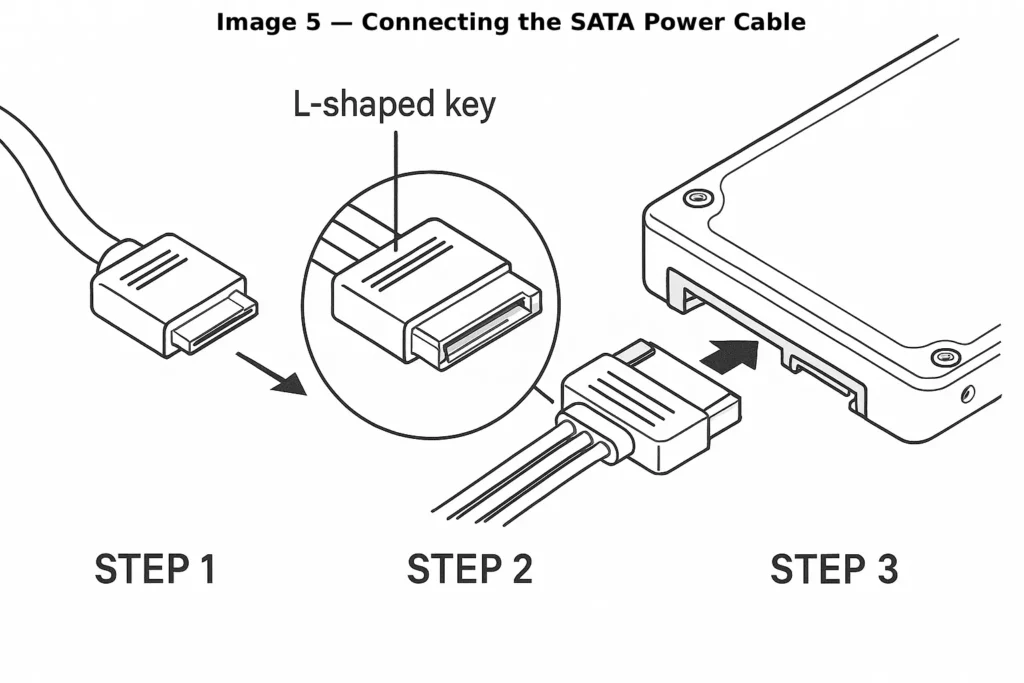
Step 5 – Connect the SATA power cable
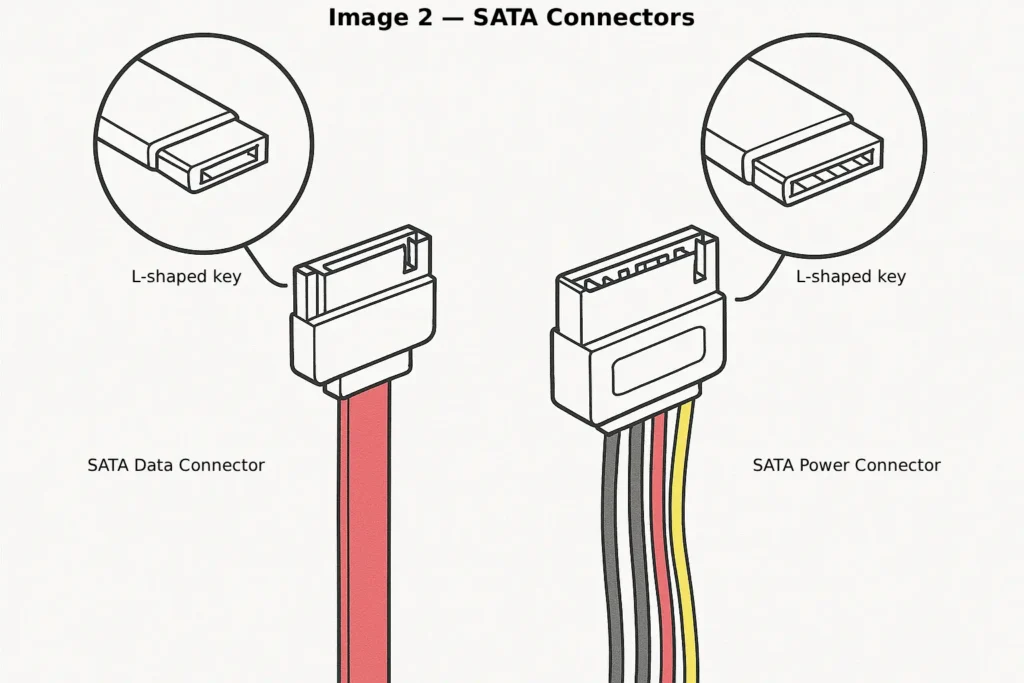
The SSD also needs power from the power supply.
Look for a flat SATA power connector coming from the power supply cables and plug it into the SSD. These connectors are keyed, so they can only be inserted in the correct orientation.
If the power supply does not have enough SATA connectors available, a SATA power splitter cable can often be used to add an additional connection.
Step 6 – Close the case and reconnect the computer
Once the SSD is connected:
- Check that all cables are securely attached
- Reinstall the side panel of the case
- Reconnect the power cable
- Turn the system back on
At this stage, the SSD should be detected by the system.
After installation
After installing the SSD, you have two main options:
- Install Windows on the SSD as a fresh installation
- Clone your existing system to the SSD
Cloning allows you to copy your operating system, applications, and files without reinstalling everything.
If you want to keep your current setup, follow the How to clone a hard drive to an SSD guide.
A practical upgrade approach for older PCs
Many older desktop systems originally shipped with large hard drives such as 500GB or 1TB.
A common upgrade strategy is to install a 250GB or 500GB SSD as the system drive, while keeping the original hard drive installed as a secondary data drive.
This setup allows the computer to benefit from the speed of an SSD while still maintaining large storage capacity for files, downloads, and media.
Final advice
Installing a SATA SSD is one of the most straightforward hardware upgrades for older desktop PCs. In most systems the installation only requires connecting two cables and mounting the drive inside the case.
Once installed, the SSD can dramatically improve boot times, application loading, and overall system responsiveness, helping extend the useful life of an older computer.
FAQ – How to install a SATA SSD
Do I need a mounting bracket for a SATA SSD?
Not always. While mounting brackets help secure the SSD in a 3.5-inch drive bay, many users simply place the SSD inside the case if no bracket is available. Since SSDs have no moving parts, they are not sensitive to vibration.
Can I install an SSD without removing the old hard drive?
Yes. In many upgrades the SSD is installed as the system drive, while the existing hard drive remains installed as a secondary storage drive for files and media.
Do I need a new SATA cable for an SSD?
Sometimes. If the computer already has spare SATA cables inside the case, they can usually be reused. Otherwise, SATA cables are inexpensive and easy to install.
Will any desktop PC support a SATA SSD?
Most desktop PCs built in the last 15–20 years support SATA drives. As long as the motherboard has an available SATA port and the power supply provides a SATA power connector, installing a SATA SSD is usually straightforward.
Is installing an SSD difficult?
For most desktop computers, installing an SSD is a simple upgrade that only requires connecting two cables and securing the drive inside the case.